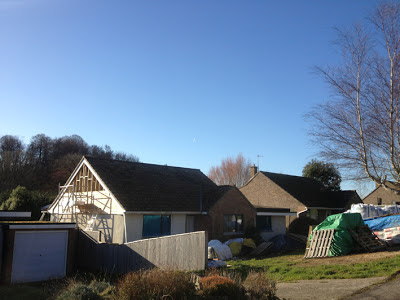
A lot of transformational things have happened to the bungalow since the last blog. The exposed eastern gable is now clad with local cedar, most of the steel guttering is fitted, and a rather smart building is emerging for the mess of the building site.
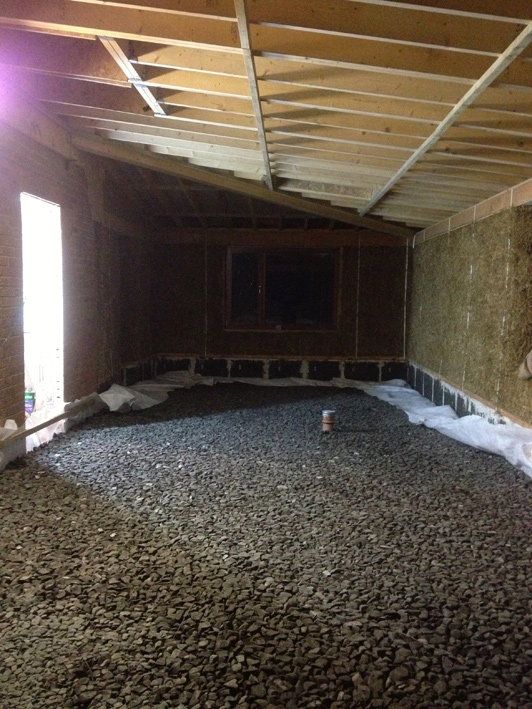
Inside, the floor build-up is complete and limecrete floor slabs are in. There is no longer a big dive down into the extension and sunroom. I was very lucky to again have help from some faithful volunteers for the floor build-up. This consisted of 20 cubic metres of lightweight (but awkward to shovel) recycled foamed glass aggregate (Glapor) which all had to be wheel-barrowed in and compacted in layers. This less-glamorous form of recycled glass (compared to the glittery loveliness of the crushed bottles in the render:
http://thewoodlouse.blogspot.com/2012/12/a-bit-of-sparkle-lime-render-and.html) is very strong (they build whole houses on top of it in Germany apparently), insulating and non-capillary. It forms a stable, warm and damp-proof base for the floor.
 |
| Wood-fibre insulation boards, two layers thick. Insulates area of wall above bales, corresponding with vaulted ceiling inside. Timber studwork to support cedar cladding. After taking this photo I realised I needed to drill a number of wide holes in some of the studs to ensure ventilation was continuous from top to bottom. |
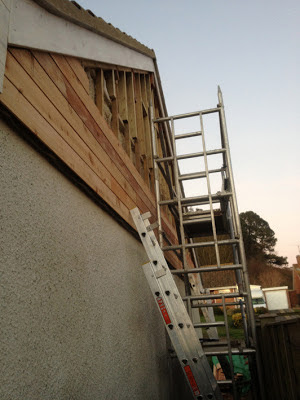 |
| Cedar cladding going up. Cedar from North Dorset, via the wonderful Eype Down Sawmill. All very local. When fitting the bottom row of cladding I highly recommend making sure you have someone to hold the other end. It would be much quicker that way... |
 |
| A rare day of clear blue sky. And frost atop the scaff tower. But it warmed up very quickly against the wall until the sun moved around. Also visible in the right of the photo is the wall of materials that make-up the floor insulation and slab. |
|
|
 |
| Cladding finished, apart from some trim at the apex where the glulam ridge beam sits. |
 |
| Preparing the sunroom for insulating floor buildup. Stage 1: line with geotextile |
 |
| More recycle glass - this time recycled foamed glass, Glapor from Ty Mawr. Very strong material, also very light, insulating, and non-capillary (it won't draw moisture up, so acts as a damp course). |
 |
| And in the extension too. It was confusing my senses as it looks so much like coal, complete with black dust. The smell from someone's coal fire down the road wasn't helping. |
 |
| Compacted with wacker plate. All the lightweight foamed-glass aggregate had to be brought in by wheelbarrow, carefully, through the new doorways. Ideally the floors would have been installed inside the brick plinth foundation walls before the bale walls went up, but in the end there wasn't time to do it then. If we had done it before the walls then the bags of aggregate could have been lifted in by machine, or even just dragged in whole by two people. |
 |
| Heavyweight concrete paving slabs (recycled from garden), to spread load of unfired clay brick internal wall. |
 |
| Lightweight limecrete slab being installed, by Lime Repair. NHL5 lime and insulating pumice aggregate, supplied by Ty Mawr. The layer of geotextile below the slab prevents the mix infiltrating the foamed glass layer. |
|
|
|
 |
| Mixers at sunset. All the limecrete for the floorslabs was mixed in these two and a large site mixer, all running constantly. Occasionally there was time to rest in between barrowing the stuff indoors and shovelling the ingredients into buckets, from which to fill the mixers. |
 |
| Limecrete floor slab nearing completion. |
 |
| Last few feet... |
 |
| Gable cladding finally finished. The cedar will weather to a silver-grey colour before too long. |
 |
| Postbox! Since the new doors were fitted we haven't had anywhere for the post to go when I'm not on site. Now we do. |
 |
| The space feels much cosier now the floor is nearly at finished level and the ceiling is nearer. Water pipes are set into the slab in ducting, to supply the toilet-room sink and Anna's studio with hot and cold water, and the toilet with rainwater, via the header tank in the loft. |
 |
| Another timing issue: the sunroom windows were held-up (we think they broke a glazing unit in the factory and had to wait for it to be replaced) so I had to fit plastic sheeting to protect the new floor slab from rain and frost. |
 |
| But then the doors and windows arrived too. That inward opening door was supposed to open out, with hinges on the right. I was seriously overtired when checking that part of the order-schedule so failed to notice it was shown with hinges on the left - meaning it would have been in the way when open. So instead we hung it inside-out, so now open inward out of the way. Thankfully this door was stained both sides (unlike the windows which are painted one side) so we could get away with the change. |
 |
| Outside the newly be-windowed sunroom. Decking will run right across the front, with steps and a ramp off into the garden. |
 |
| Finally finishing the end of the drains (dug-in during the ground works last June) to bring them up in right place to take rainwater downpipe. The connection point for this one was a bit too far past the end of the wall, hence absurd run of connecting bends. |
 |
| This one was simpler though further away. The marker post for this one got removed when I wasn't looking, I think when we were barrowing the limecrete around for the sunroom. Thankfully I had a good idea of where I should dig to find the connection, after seven months of tripping over the marker post. |
 |
| Back filled with pipe-bedding/pea-gravel, and topped with bricks, allowing me to walk and wheel-barrow over it. |
 |
| The first gutters! So satisfying to get these up at last and end the waterfall of water off the sunroom roof. Drains from the tiled roof connect up to the rainwater harvester tank, from [what will be] the greenroof to the soakaway. |
 |
| This seemingly simple bit of guttering took most of the morning. Most of that time was spent dropping screws and driver-bits, trying to screw the hopper in place at the end of the roof valley in the awkwardly narrow space. |
 |
| A little light snow on the kitchen roof window. |
 |
| Snow sliding off the barge board above the cladding |
 |
| The last section still awaiting new guttering. I can't fit the gutter until I can get the finish coat of paint on the fascia board, and I can't do that until it's simultaneously warm and dry enough to get away with painting outdoors. That shows no sign of happening soon. |