With the photos below I think I've managed to get this blog back in sync with reality on site. The top two coats of lime render have gone on and gone-off (dried and cured sufficiently to be safe - touch wood - from the winter weather) and are now protecting the bales properly from the rain. The final coat was made with recycled glass aggregate (crushed and tumbled bottles), then scrubbed-up to strip the lime off the big bits of glass. From a distance it has an off-white appearance, but as you approach an increasing amount of colour and just enough sparkle is visible. We love it. Much time has been spent staring at the walls with huge grins on our faces. I have an obsessive amount of render-finish photos, taken in different lights and different stages of dryness to try and best capture the colour and sparkle. It's really hard trying to resist showing them all to anyone who asks about the bungalow. I've been selective below, in the understanding that one person's beautiful render album is another's endless close-up photos of a bit of wall.
The lime needed looking-after during it's initial setting: to cure/carbonate properly it needs moisture and air. If it dries out before curing it has to be sprayed with water to keep it moist, and if the sun is directly on it and trying it too fast it needs covering. Only the south wall of the extension ever caught enough sun to need protecting, and that was easily covered in hessian (which shades it whilst still allowing air and water through). The sun was short-lived in any case - most of the time the weather has been quite mild and damp which is probably ideal lime-curing weather. Each layer of render did still dry out quite fast though (it's quite a windy spot up the hill) and needed regular damping down. It felt particularly perverse having built large roof-overhangs to protect the walls from direct rain to then be spraying the walls directly with a hose, sometimes while it was actually raining.
It's very satisfying to see the colour change in the render with each spray of water - initially it's all a bit creamy in colour, then lighter when dry, then back to cream after spraying. Once the surface at least has cured it goes a cleaner white colour, which starts to hold even when wet again.
The other danger to fresh render is frost, but thankfully the mild weather held long enough for the lime to go off enough to be safe. If it had frosted earlier we would have had to wrap all the walls in hessian to protect them.
The rendering was done by
Lime Repair who have done a fantastic job, giving our home nice crisp lines and lovely gentle curves, and helped get me started with the scrubbing.
Tomorrow a huge delivery of thirty pallets and tonne-bags arrives, containing all the recycled foamed-glass aggregate for the floor insulation build up, and the the lime and other recycled aggregate for the limecrete slab that'll form the new floor base (from
Ty Mawr). Fitting it all on site around the tree at the front will be awkward but I think it'll
just squeeze in within reach of the lorry's crane. Also on that delivery will be wood-fibre insulation boards which will be used to insulate the remaining area of gable wall above the bale wrap, that corresponds to the vaulted ceiling indoors. I need to get those up quickly so that I can finally fit the timber cladding to the top half of the gable and get that end watertight.
 |
| The first coat of render revealed a dodgy bit of bale-dressing on the front corner (annoyingly I'd seen it when trimming the straw and had meant to deal with it but forgot). The render made the bulge in the middle of the corner more obvious - almost the first thing Sam the Plaster noticed on return to site - so I chipped off the render, pulled out a load of straw and retied the bale so that the corner could be straight. |
 |
| Second coat of lime render (Float coat) going on over the scratch coat. |
 |
| Sam the Plaster using a Straight Edge to put a straight edge on the wall |
 |
| All trowelled on, but not yet floated up (rubbed-up with a plasterer's float once it's stiffened up) |
 |
| After floating |
 |
| For some reason I find this pleasing (it's actually horse hair to add to the render to strengthen it) |
 |
| Woodlouse! They love lime. Somebody probably know why, but I don't. |
 |
| Oak render stop sanded down, looking lovely after being limed (as well as lodging in the grain, the lime reacts with the tannin in the oak and darkens it) |
 |
| The recycled glass aggregate (crushed and slightly tumbled bottles, supplied by Ty Mawr) arrives, causing much excitement with me and the plasterers. We kept grabbing handfuls and letting it run out through our fingers and laughing like pantomime villains with their hoard of jewels. |
 |
| The big sack of jewels |
 |
| Cream together the butter and sugar... |
 |
| Sam the Plaster trowels on the glass/lime mix in the back porch, the only bit where it'll be flat (though we like it so much we now plan to use it inside in a few places where the light will catch it) |
 |
| Julie Lime-Repair (boss) escaped the office to come and play with the glass |
 |
| Back with the sprayer for the roughcast coat on the outside walls |
 |
| As before the sprayer covered everything, with the crunch of the glass underfoot part of my mind kept thinking it had snowed. Here drip from the gutter has washed the lime/snow away to reveal the jewels within |
 |
| It looked a bit toothpasty or softminty at this stage |
 |
| Snowy wall |
 |
| A small test, using the glass with clay plaster for the bathroom (also mixed with a little lime-putty to help it stick to the bricks and lighten the colour). |
 |
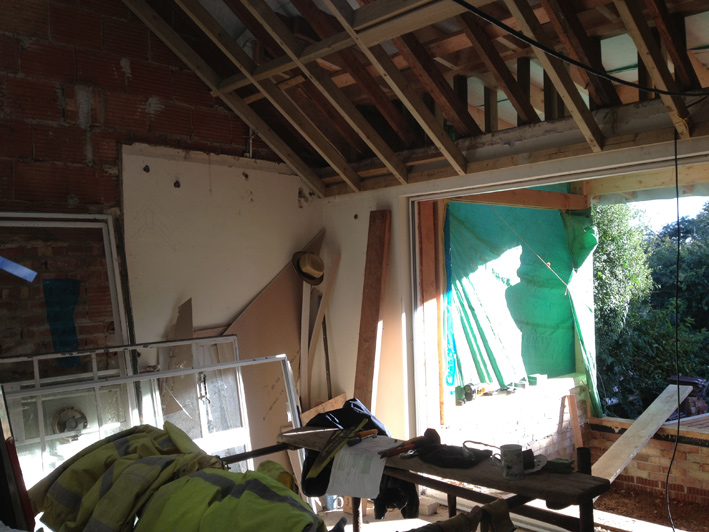
| The walls emerge from the plastic for the first time in weeks, finally complete. |
 |
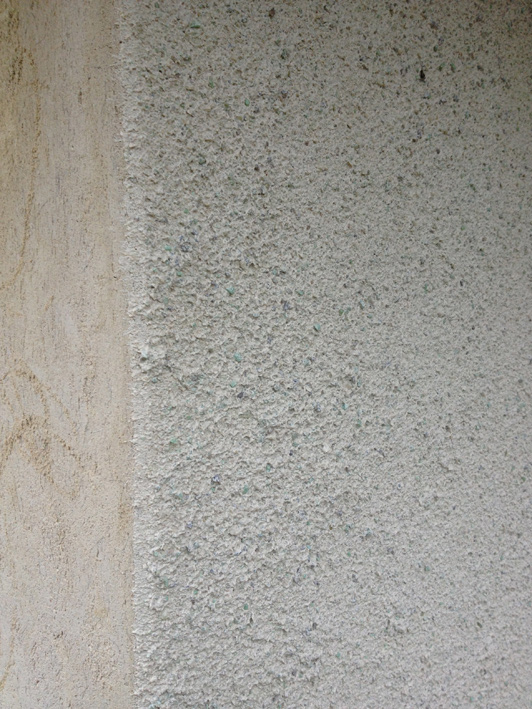
| From a distance the render appear a bit mottled, off-white. As you get close it shows the glass and sparkles a bit. |
 |
| To strip the thin surface layer of lime off the glass I scrubbed it down with diluted brick acid (not very eco - but very small quantity used) and a churn brush. Thanks to Sam for helping figure out the best system. Eventually the system settled down to: spray the wall with water (once the render has gone properly hard), brush on the dilute brick-cleaner, scrub, gently spray with more water, scrub some more, then thoroughly rinse the wall down. |
 |
| The flat section in the back porch, scrubbed up with a sponge. |
 |
| Conservatory base-level finally set to the correct height, with compacted scalpings, ready for loose-fill recycled foamed-glass insulation. |
 |
| The lovely sparkly render. I'm so excited by this. |
 |
| Light doing nice things through the living room rooflight. |
 |
| The brush on the right has just been used to scrub down all the walls to reveal the glass. Before that it was more like the brush on the left. |
 |
| Glassy roughcast lime, with newly-oiled oak render stop |
 |
| Sunroom structure just had it's first coat of oil too (using Osmo UV protection oil, which will leave a fairly matt, satiny finish once it's soaked in and dried, and will allow the wood to breathe). |
 |
| The main eaves beam still awaits its first coat. It was getting too cold and damp in the late afternoon to risk carrying on - a problem with trying to do outside finishes in late November. That and the fact it's dark just after 4pm. Still, very satisfying to have got this far. |