' the Woodlouse: May 2013

Pages

Sunday 19 May 2013

'Natural' isn't necessarily 'sustainable'


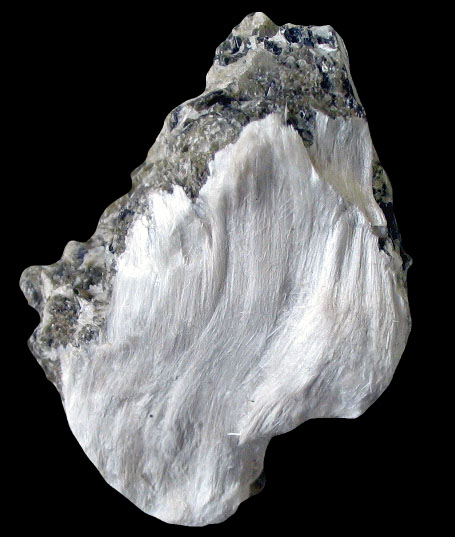
naturally occurring asbestos

When choosing materials to use in our build we try to choose the most sustainable.  Sustainable living means making best use of available resources, aiming for the smallest negative environmental and social impact possible.  This is more complicated than simply using 'natural' materials.

I think the terms 'natural building' or 'natural materials' are unhelpful.  The presumption is that natural is good, artificial is bad.  'Natural' is often used interchangeably with 'sustainable'.

Even before questioning whether it's accurate to conflate natural with sustainable, there's a whole philosophical debate to be had about what is or isn't natural.  For example my preferred building material is strawbale, which is often called natural.  It's the dried out stalk of a plant - something that grew - so of course it's natural.  Really?  But it's also the product of machine-dependant industrial agriculture, a mono-crop that wouldn't occur on the same scale without human intervention.  Following that train of thought I ask: at what point does human activity stop being natural?  We're products of nature; maybe anything we do is natural.  But that would soon render the term fairly all-encompasing and so meaningless in any helpful way.  Or is human-made unnatural, and everything else natural?

Natural materials are often seen to be either those things that grew (plant-based), or other things which occur in a useful form (like stone or slate).  In reality, both will usually have had to undergo some form of processing.

Straw has been compressed and bound up in to a more-or-less regular shape, the machine-made bale.  Strawbales might not fit a definition of 'natural', but they do fit my idea of sustainable.  It's using a waste product.  Despite the oil burned by farm machinery strawbales are generally held to be carbon negative - there is more carbon locked up in their structure than has been released in their manufacture and transport (and if the straw was left to rot, that carbon would be released back into the atmosphere, which it is not whilst the bales remain part of our walls).

Stone has been quarried, usually by machines, and transported large distances.  On an industrial scale quarrying can be very harmful to the landscape and there can be issues with polluted water run-off from the quarries.  Seen like that I think it looks a lot less sustainable.  It's a scale though: stone is certainly more sustainable than cement, which has a much higher amount of carbon associated with it's manufacture, and more harmful pollutants.

Slate is a fine 'natural' material.  The processing is minimal.  If sourced locally and on a small scale it could be sustainable (the same applies to stone).  But much roofing slate these days is imported from Brazil, in which case the carbon and pollution caused by its transport stops it being sustainable.

Is natural necessarily good anyway?  There are many examples of highly toxic, natural things.  Here are just two: Deadly Nightshade is a naturally occurring plant - which as the name suggests, really is deadly if you eat it; Asbestos is a naturally occurring mineral - but the World Health Organisation estimates that 107 000 people die each year from asbestos-related lung cancer, mesothelioma and asbestosis resulting from occupational exposure to asbestos.

On that cheerful note I'll end this shortish rant.  For ease I do sometimes describe materials as natural, but I've been increasingly finding it rankles.

Saturday 4 May 2013

Emerging from the dark winter

My last post was three months ago. I'm not doing very well at regularly updating this blog, am I?  I've just been too tired and unmotivated to sort it out in the evenings or weekends.  The cold, dark bit of the winter seemed to be going on for an awfully long time.  With the roof of the bungalow and extension still uninsulated and endless ways for wind to get into the building, it got and stayed pretty cold in there.  Fine when waving bits of timber and a nailgun around to build stud-walls but not so good when lying on the floor stuffing sheepswool insulation into gaps, or fitting the last bit of guttering with a light snow falling.  The project management side of things suffered a bit through the darker winter months as well.  The last thing I felt like doing in the evenings was sitting at the computer.  I probably could have moved things on a bit more if I'd been more on the ball.

At the end of March it was a year since we started, and another revised estimated date of completion rolled cheerfully by without much sign of a moving in date.

But now Spring is here and this year it really feels like spring.  The psychological benefits are remarkable!  Things are moving forward steadily on site.  Right now the first-fix electrics are being installed (photos in next blog), cables all over the place.  Once that's done the next lot of transformative jobs can begin.  Getting the timber frames up for the internal walls up a while ago was great, it suddenly felt like the whole place might yet become habitable.

At some point in the next month or so I hope to build the main dividing wall in the extension, which will be thick straw-clay, to provide an acoustically insulated barrier between Anna's studio and my office so we can both make noise and work at the same time without irritating each other.  I'm looking for volunteers interested in helping mix up the straw and clay, before lightly ramming it into shuttering to form the wall.  It's a relatively light mix - much more straw than clay - but forms strong walls when dry.  It also acts as a good thermal store and the clay in it helps to regulate moisture levels (as does the clay plaster which will cover it and all the strawbale walls) by absorbing excess moisture which then evaporates when humidity levels drop.

Anyone who might be interested in volunteering for the strawclay wall, and/or also for clay plastering which I hope will follow shortly after, please send me your contact details and I'll get in touch when I have dates.  Email: johnbeebutler @ gmail . com (without the spaces, obviously), or get me on twitter: @the_woodlouse

Hopefully the next blog will be soon, I already have enough photos for it.

Thermometer at zero degrees celsius
Without roof insulation and draft sealing - it got pretty cold in there

exposed kitchen and bathroom after the old wall is demolished
The old bathroom and kitchen wall finally knocked down.  I put up a temporary bathroom wall shortly after, for reasons of privacy

solatube light-pipe domes, seen from the roof
New solatubes fitted.  Cutting holes in the watertight roof covering felt very wrong.

Solatube sealed to roof with silicone, joint then doubly waterproofed with rubber sealant tape
The solatub dome is sealed to the roof with roofing sealant, but I got the EPDM roofers to seal around it with their sealing tape as well, when they cam back to fix a couple of leaks (where seams hadn't sealed properly first time)


view of front door with neat new guttering above it
The last bit of guttering finally in place

Shiny new nails for shiny new nailgun

Electric mitre-saw and view of the roof, with two layers of rafters to allow insulation.
With the aid of wonderful mitre saw, I fitted the lower row of rafters which will hold the ceiling up, creating a void to fill with insualtion.

Me in the loft, looking like a fool (Brimmed hat to stop spiders dropping down my neck, fleece hat for warmth)

Woodfibre insulation, fitted to the wall above ceiling height in the old bungalow - the idea is to help reduce thermal-bridging (heat loss through heat being conducted up the brickwork from the living space)

And similar at the other end of the loft, here also to prevent heat loss from the extension (with its higher ceiling level) into the loft.  The black tank will be the header tank for the rainwater harvesting system - from which the loos will be flushed.
And similar at the other end of the loft, here also to prevent heat loss from the extension (with its higher ceiling level) into the loft.  The black tank will be the header tank for the rainwater harvesting system - from which the loos will be flushed.

position of door-opening, marked out on floor
Here will be a door...

Vibration control foam, for acoustic isolation of structural elements.
The snail of acoustic vibration control

Vertical timber 'studs', with the foam-rubber on each end.  This limits transfer of sound-vibrations through the structure, helping Anna and me make noise in our respective spaces without annoying each other.
Vertical timber 'studs', with the foam-rubber on each end.  This limits transfer of sound-vibrations through the structure, helping Anna and me make noise in our respective spaces without annoying each other.

mitre-saw trapped in new corridor after the wall is built
Saw position not seeming so clever now I've built the wall.

studs and base-timbers separated by foam

Clay slip coating the strawbale wall before end wall-stud is fitted against it
Clay slip coating the straw before end wall-stud is fitted.  The first stage of clay-plastering will be to cover all exposed straw with clay slip in the same way.

Finished studwork with very useful nailgun hanging off it
Finished studwork and the nailgun that made it possible (or at least, very much quicker)

Chocolate the miniature Dachshund looks up
Chocolate contemplates Anna contemplating internal bathroom window options

The section at the front of the bungalow that is remaining as brick outside.  This is insulated internally with Thermafleece sheepswool, in timber frame.  This is the first layer
The section at the front of the bungalow that is remaining as brick outside.  This is insulated internally with Thermafleece sheepswool, in timber frame.  This is the first layer

High-tech solution for cutting sheepswool insulation to size - two cramps, some wood and a breadknife

Second layer of sheepwool internal insulation being fitted to the wall
The second layer of sheep

3 layers of insulation by window reveal, small section of wall that can't be insulated as to do so would prevent window from opening
And the final layer.  The inward opeining hinges of the window are too close to the edge of the frame to be able to insulate that little bit of wall next to it.  That will be a thermal bridge (althouth there is still cavity insulation between it and the outside) - I wish we'd foreseen this and planned around it, but hopefully we won't lose too much heat that way.  It's a good example of one reason we wouldn't quite meet Passivhaus criteria, as they are meant to be virtually thermal bridge free.  Much harder to achieve in retrofit.

Final layer of insulation complete, first bit of VCL going on - Vapour Control/airtightness Layer/membrane to prevent moisture getting into the insulation and causing potentially harmful condensation

Airtightness/Vapour control layer complete around the internal insulation.  Battens to hold plasterboard and create void through which electric cables can be fitted.
Recycled-paper Airtightness/Vapour control layer complete around the internal insulation.  Battens to hold plasterboard and create void through which electric cables can be fitted.


Internal sheepswool insulation by the front door

And VCL/airtightness over it.

Plasterboard fitted to walls by front door
Plasterboard fitted to walls by front door - this area needs finishing earlier than everywhere else so that electric consumer-unit (fusebox) and meter can be fitted there.

First cost of bonding plaster to even up levels over brickwork next to doorframe.
First coat of bonding plaster to even up levels over brickwork next to doorframe.

Plasterboard by front entrance plastered over and looking neat
My first proper plastering, so satisfying.  I love plastering, would love it more if someone else was mixing the stuff up for me.  I also really like the way it transforms a messy collection of boards into a unified solid-looking mass.