I'm exhausted! It's been one of those phases where suddenly lots of big things are happening at the build and the space is transformed again. The inside spaces of the bungalow are taking shape and almost all of them now have at least some kind of wall, and are more or less defined as they will be when all is done. Over a fortnight the big thick strawclay wall went up (the main internal structure in the extension, acting as thermal mass/heat-store and soundproofing between Anna's and my workspaces), as did the also-big masonry stove that will provide us with a highly efficient and lovely source of heat. Each of those is probably a blog by itself, so this one is about the less exciting but still crucial bits that happened before.
It's all about the details. Everything. Always.
Okay, maybe not actually everything, and not quite always - but a lot of times in life it's the details that define something or lift it from barely passable to something wonderful. It's definitely true of the build. Paying attention to the details of finish should make the home lovely to be in. But before that there's a lot of very mundane details to resolve to ensure the building functions well and efficiently, stays warm and dry, or cool and dry and summer; that things are set up well so that later stages of the build go smoothly, with things fitting together as they should; and that the finished house is easy to live in, move around, and equipment is easy to use with switches located in sensible places (for example).
It's been said that sometimes (often?) this blog is a load of semi-technical waffle followed by a load of photos of holes. I concede that there is some truth in this! The rest of this blog may fall into that category, although instead of holes it'll be photos of taped-up things, air-sealing grommets, hazel pegs, and cables (and maybe one shallow hole, right near the end).
I spent what felt like far too long wondering around the bungalow sealing things up with a variety of different industrial-grade sticky-tapes. This may well be my least-favourite activity yet, rivalled only by the shovelling and compaction of 33 tonnes of chunky (hard-to-shovel) stone into the
foundations in the rain last year. It was necessary to make the building airtight, or as airtight as possible.
Airtightness is really really important. The most wonderfully insulating strawbale walls and deep cosy roof insulation are not much good if there's a big gap between them through which the cold wind blows. Around 20-35% of heat loss from homes is typically through ventilation. This includes through open windows, doors and airbricks, but also through less obvious means. Draughts around poorly-fitting window and door frames, around cable and pipe entries into the home or through ceilings, even cracks in plasterboard ceilings or masonry walls (
Greenspec have a helpful diagram with more info about
airtightness and heat loss here) all allow warm air out, and cold air in. Attention to detail to seal up these points of leakage is essential to create an energy-efficient building.
Airtightness does bring it's own problems. Many of the problems of dampness in buildings stem from moisture in the air condensing on cold surfaces. Ventilation is necessary to remove the damp air from the house. The common way to deal with damp areas is basically to make a hole in the wall (or window frame) and cover it with a grille. This is effective at removing the moisture, it's very simple to do, but is also very effective at removing a large amount of heat. The other problem with airtight homes is a lack of fresh-air and oxygen. This is all avoided by use of a ventilation system with heat recovery. This (unsurprisingly) recovers heat from air being removed from the home and puts it back into the air coming into the home. We have opted for a ducted whole-house Mechanical Ventilation system with Heat Recovery (MVHR). This uses a low-power fan to extract air from the dampest rooms (kitchen, bathroom, anywhere with a sink or a loo, entrance room with wet coats) and supply air to all the other rooms (or sometimes the other end of the same room). The supply air and extract air pass through a heat-exchanger which recovers around 90% of the heat which would otherwise be lost. The components of this are now onsite, a worryingly large 3D jigsaw for me to piece together sometime soon.
Any kind of combustion heating is a problem with an airtight home. Whether it's a gas boiler or a woodburning stove, it needs air to burn cleanly and safely, without running the risk of carbon monoxide poisoning. Building regs require a permanently open air vent for a stove in an airtight house. Again, normally this would be a hole in a wall, which renders completely pointless all that painstaking work to thoroughly insulate the building and prevent draughts. So the stove will have it's own dedicated air-supply, channelled directly into it and separated from the room.
The next blog will have more pretty pictures and less explanation. Maybe.
 |
| Airtightness detailing: holes around metal wall-ties taped over, membrane strip glued and stapled in place to seal potential air-leakage point between brick and bale walls |
 |
| No good having a well-sealed window if the frame isn't sealed well to the building. Despite silicone sealant around the frames on the outside I could feel the air blowing through around the frame. The tape eradicated that. |
 |
| MVHR (heat-recovery ventilation) ducting and fittings, looming at me. |
 |
| Once again, ready for vampire attack. |
 |
| Electric fittings stage 1, 2 and 3: trim back the straw where light-switch or electric socket will go, hammer in hazel pins, cover straw with clay-slip |
 |
| Electric fittings stage 4: level (and fireproof) the area with clay-plaster (clay and chopped straw) |
 |
| Electric fittings stage 5: Screw smartply OSB offcut to the hazel pins. This allows a bit of flexibility when fitting the switch/socket boxes, meaning they can positioned exactly where needed. Much easier than trying to place the hazel pins perfectly. |
 |
| LSF (Low Smoke and Fume) PVC-free cable. PVC is a very polluting material, in production and disposal (http://www.healthybuilding.net/pvc/ThorntonPVCSummary.html), responsible for chlorine and dioxin release. It also releases highly toxic fumes in the unlucky event of a fire. PVC-free cable is also tougher, which is an added bonus. |
 |
| Justin the electrician hasn't totalled up the distance yet but we think there's around 2 km of cable in the building now, for sockets, lighting and switching, and data. Shocking how quickly it adds up. |
 |
| And finally: socket back box fitted to OSB, pinned into straw |
 |
| Home-made airtightness grommet (EPDM rubber-roofing offcut) where cables come through recycled-paper airtightness membrane in the ceiling. |
 |
| Cabling in the Bat Loft |
 |
| There's a hole in my wall... |
 |
| Now there's an LED light filling it |
 |
| Very discrete external LED light fittings they are too. |
 |
| Boxing for an MVHR duct, under sunny windows. I'm really liking the sun this year. |
 |
| One of those "doesn't look much but feels momentous" moments - waterpipe finally persuaded to get around some awkward bends in the service duct linking the outside rainwater harvesting tank with the house. |
 |
| And at the the other end... |
 |
| Ta-da! One pipe supplies rainwater to the header-tank in the loft, the other will dump it back into the underground tank if we go away (the water will go stagnant in the warmer loft but will stay clear and nice in the cool, dark underground tank). |
 |
| An opened up bale demonstrating the behaviour of water and rot if you get a leak through bales (in this case via rubbish tarpaulin covering spare bales throughout the wettest year on record in England). The water drains straight through the straw, and only the area immediately below the leak rots. If this happens in a wall the rot can be cut out and new straw stuffed in. |
 |
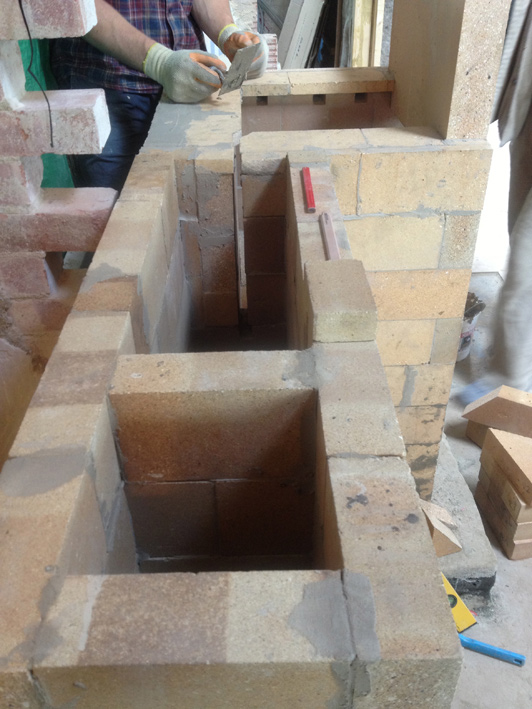
| Making more of a mess of the floor, in order to fit air-supply for masonry stove |
 |
| Air supply pipe to another dimension |
 |
| Floor repaired, insulating (and strong, and recycled) foamglas slab fitted, with NHL lime screed on top, air pipe in centre, ready for stove. |
Finally, a footnote about electric cables and strawbale walls. Despite the beliefs of almost any electrician, and even a few green-builders,
you do not need to use armoured cable in strawbale walls! This idea seems to have spread via Grand Designs and
Ben Law's otherwise amazing build in Sussex. The idea is that mice or other animals might like to live in the straw, then might nibble through the cable-covering, then an electric spark might trigger an almighty, home-destroying blaze.
There are a couple false assumptions here. Firstly the mice: they probably would like to make a bed in straw, but are equally - if not more - likely to nest in any loose insulation materials, such as are commonly used in walls and ceilings through which cables often run. If the bale walls are built properly there is nowhere for mice to get into the bales. The bales are dense, compressed and compacted, and completely covered in plaster or render. Secondly the fire risk: strawbale walls have
been tested and found to exceed the bulding regs requirements for fire resistance many times, withstanding fire for 2 hours 40 minutes before a fail (smoke penetration from one side to the other - still not a fire). Strawbale construction has been
approved for bushfire areas of Australia (pdf link). In any case, the cables are run on the surface of the straw wall in conduit which is then completely encased in clay-plaster.
I'm sure I'll return to the subject of strawbale and the perceived fire risk - it's a myth that needs some serious busting!